How to build a WiFi controlled Maneki-Neko using an ESP8266
In this post I’ll show how I added WiFi remote control capability to a golden beckoning cat I’ve bought.
I bet you already know those golden waving/beckoning cats that you can find mostly in japanese restaurants and hacker conventions. They are available at a very low price, different colors and styles, and are usually powered by a single battery which powers a small chip that pulses a coil which in turn attracts/repels a permanent magnet in the lever/pendulum part of the paw construction.
I thought that it would be nice to power this thing using USB and to make it controllable using WiFi. For this, something relatively small is needed, because there is not much space inside the cat. That’s why I decided to go with the Wemos D1, a small board with an ESP8266 and a USB to UART converter on it. This allows to power and flash the cat while it’s closed which makes software updates a lot easier!
Teardown
There are numerous tutorials available on YouTube on how to properly open those things up but I found that just cracking it open, removing the clips from the bottom panel and using tape to close it was more convenient when opening it multiple times.
The first thing to do (after removing the batteries) is to remove the arm/paw. You can do that by pushing it towards the back of the cat until it unlocks. You can then remove the arm from the pendulum mount.
After that, remove the panel on the bottom and pull out the whole frame carefully.
Now it’s time to cut the cables to the battery department and to remove the pcb. Find out where the coil is soldered to the pcb and be careful not to break the fine cables while soldering plug cables (trust me, it’s easier to maintain it that way than just soldering the coil to the esp) to each connector.
As you might have noticed we are not supplying power to the controller chip on the pcb, instead we are bypassing it and we’ll power the coil directly using pwm. The reason for that is that the ESP gives out 3,3V or 5V when powered with USB and the controller is used to 1,5V. Adding other parts to get the voltage down is waste imo and powering it with pwm resulted in the chip not being able to pulse properly.
Upgrading
Make sure you know how you want to power the thing. I put a hole through the back of the cat and glued a USB cable in place, but I guess you could also try to add a usb port or a battery inside it.
Because I made the USB cable long enough to pull out the ESP, I needed to add a little cover for the pendulum made from random plastic packaging I had around. You might want to build a similar thing to keep cables out of the way and the cat waving.
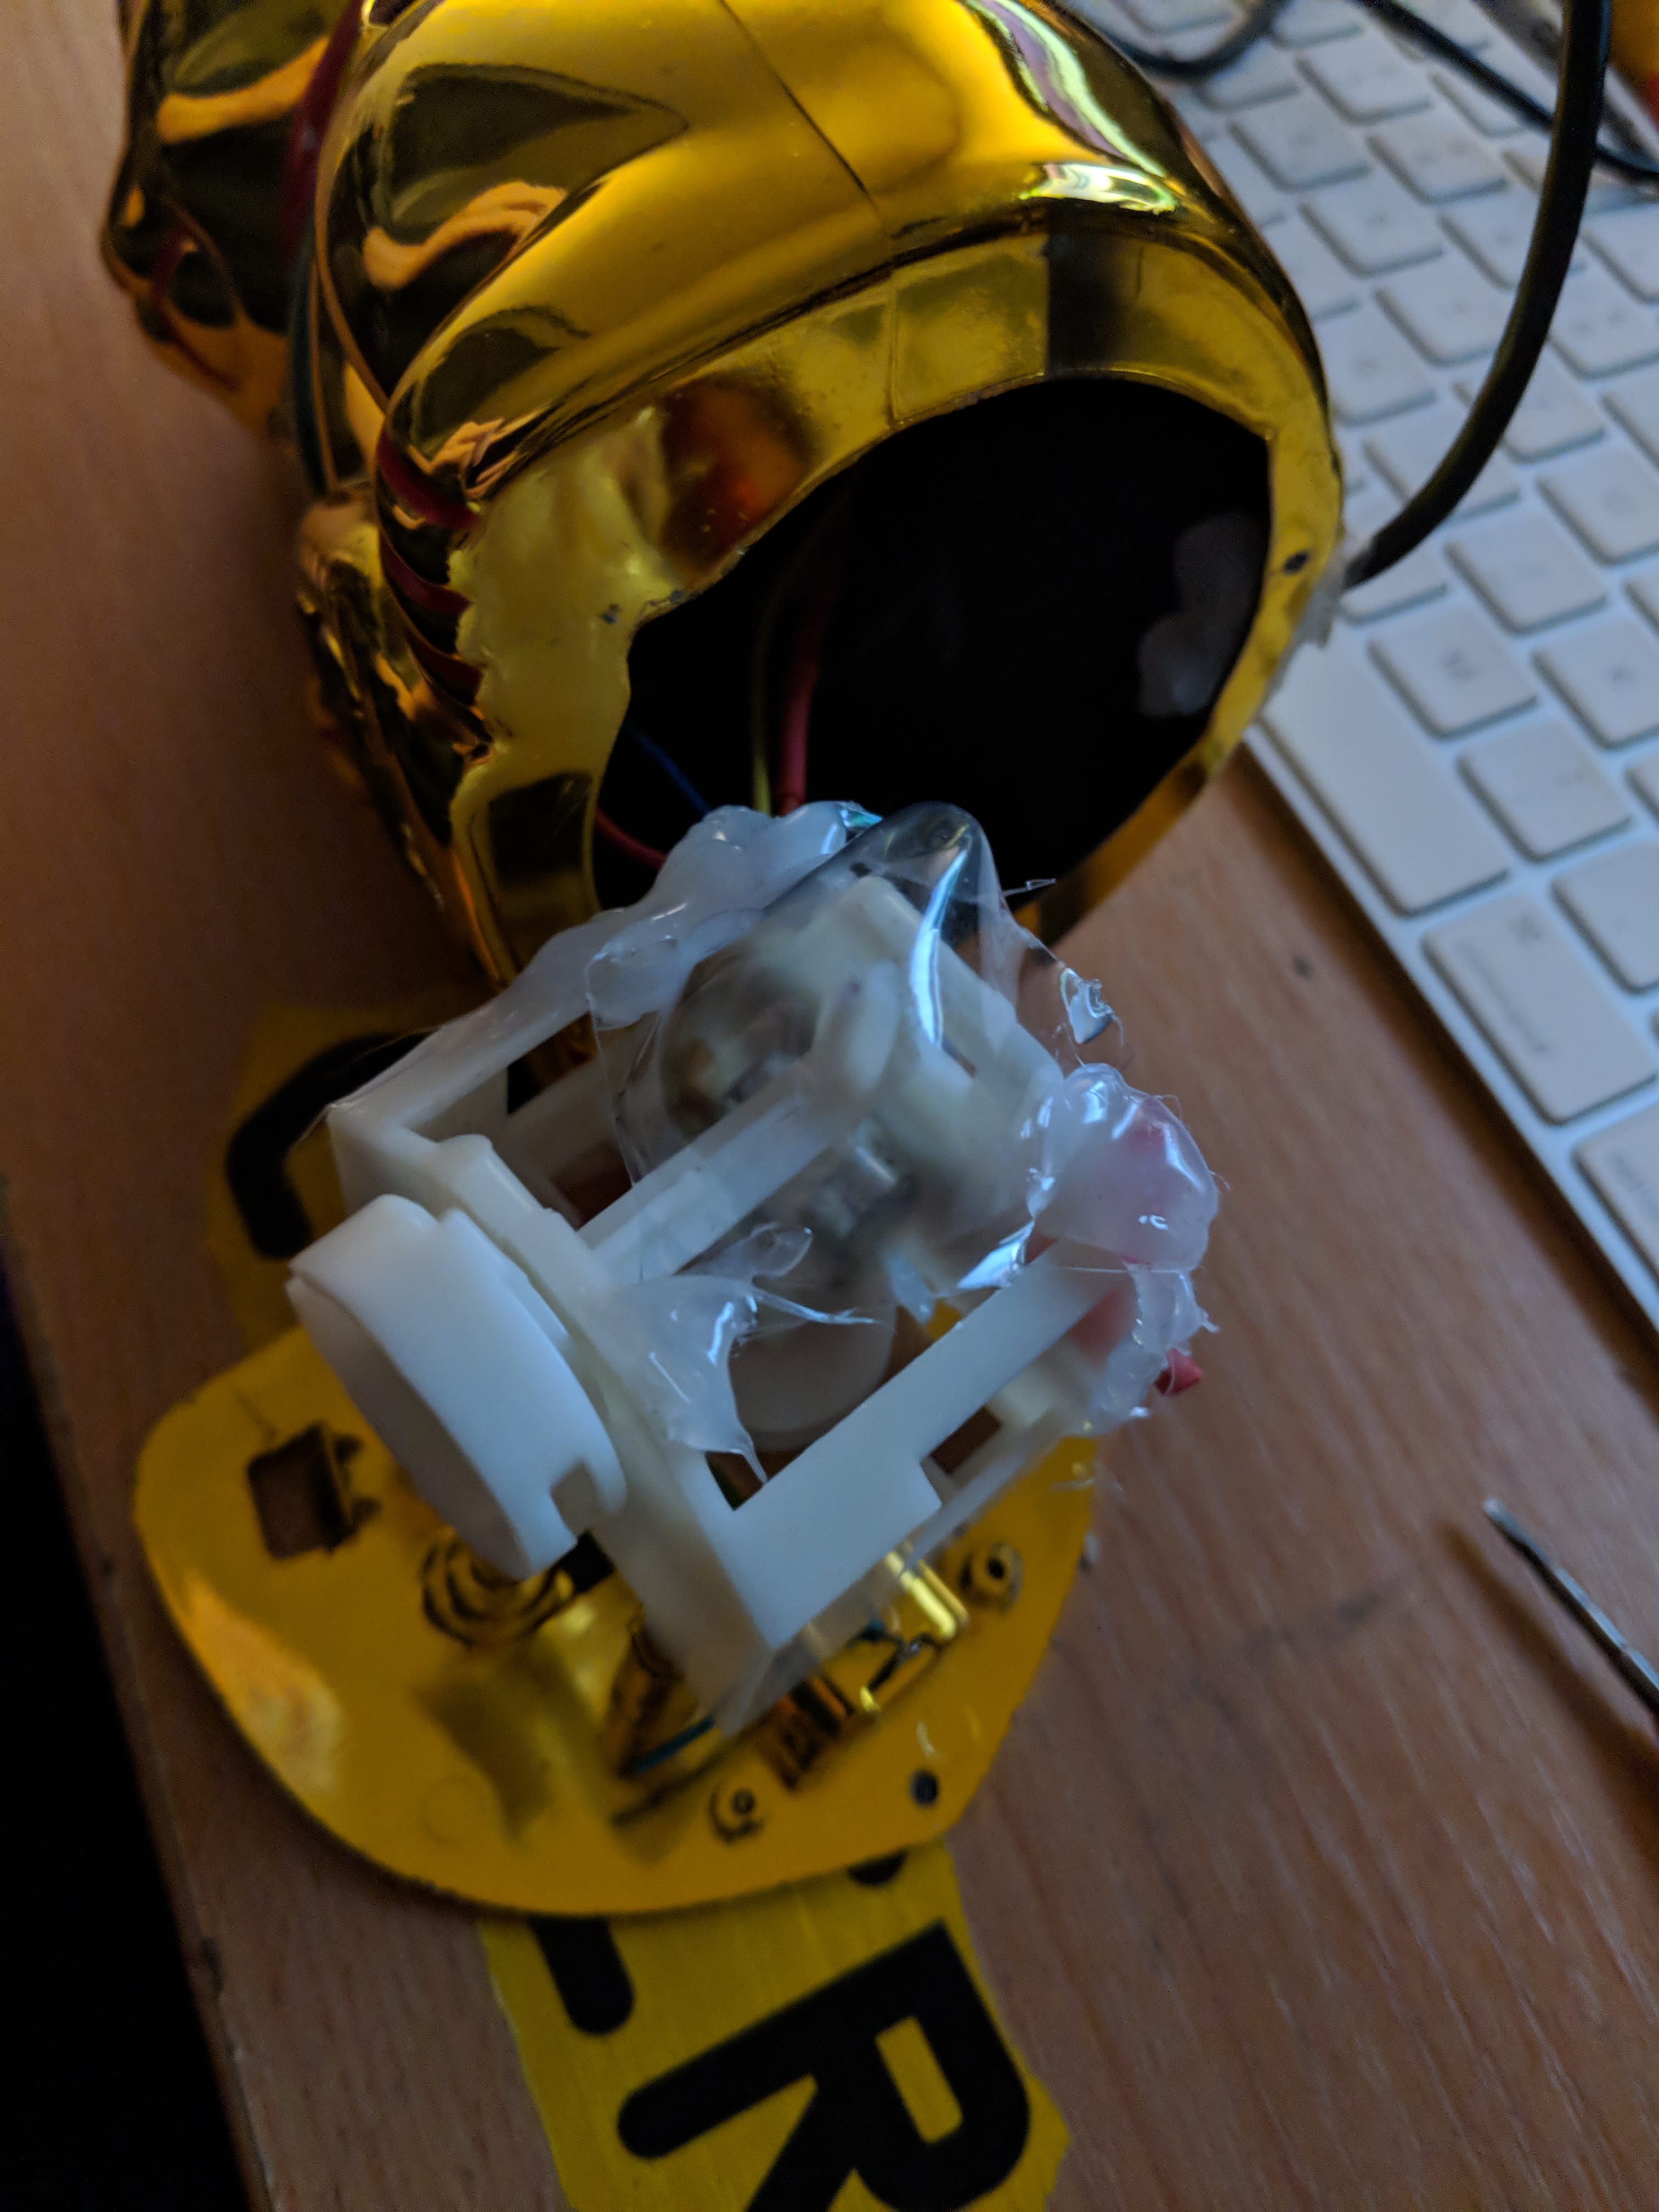
To get it to work you’ll need to connect one cable from the coil to the GND port of the ESP and the other one to a random GPIO port that supports output. After that you can squish everything inside and put it together.
Writing Code
I’m using the Arduino IDE for this. Luckily there are no libraries to include to get the basic functionality (although the whole build would be a bit senseless if you just use the esp to control the arm without adding any new features).
The most minimal .ino file for getting the waving to work properly looks like this:
#define nekoPaw 0 // paw pin, this is connected to the coil

bool firstWave = true; // variable used below to ensure the cat starts waving

/*
 * This method will run once when the device is powered up.
 */
void setup() {
    pinMode(nekoPaw, OUTPUT); // allow pwm for the pin attached to the paw
}

/*
 * This method will run continuously until the device is powered down.
 */
void loop() {
    analogWrite(nekoPaw, PWMRANGE); // power up the pin
    if(firstWave == true){
        delay(500); // wait a longer time than usual to ensure the pendulum is pushed far enough
        firstWave = false; // prevent the long pulse from happening again
    } else {
        delay(80); // wait the usual amount
    }
    analogWrite(nekoPaw, 0); // power down the pin
    delay(870); // wait for the pendulum to swing back
}
As you can see I had a hard time finding out the ideal timing for the “regular sized” (I guess) cat and you might need to adjust it if your cat has a different size. The longer pulse at the beginning serves the purpose of properly pushing the pendulum all the way regardless of starting position. This assures that the timing is correct and the waving stays continuous.
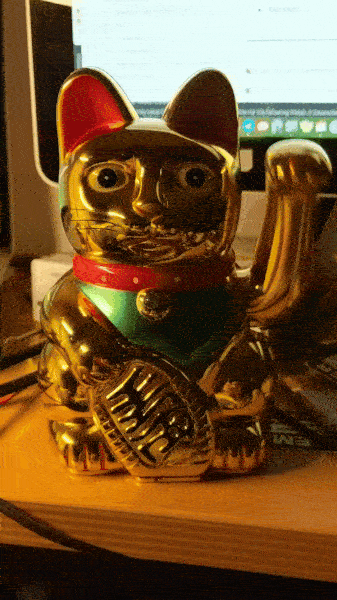
That’s it. You should now have a working ESP controlled Maneki-Neko. Now it’s time to implement WiFi/HTTP support or anything else you’d like to add. For example I also added an LED to see when it’s pulsing. This is how my finished cat looks:
Have a good day and if you build your own, feel free to share it with me :)